I made a tiramisu for our parish supper last night. (No pictures, sorry! Some day I’ll get better at taking them.) I actually had people compliment me on it and at least two requests for the recipe I used. So here you go:
Beth’s Tiramisu
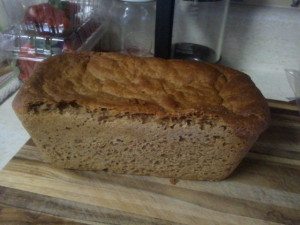
- 1 Sponge cake (I used the recipe here*, I used fresh milled soft white wheat and sucanat for the flour and sugar,it worked well.)
- 16 oz of ricotta cheese
- 1.5 cups of whipping cream
- 1 cup powdered sugar
- 2 cups of strong coffee (I put in twice the amount of coffee)
- 2 tablespoons Rum/Kahlua/Espresso Vodka (totally optional)
- 1/3 cup of cocoa powder
When I made the cake, I baked it in a 9 x 13 pan. This recipe will make two 8 x 8 tiramisus.Â
Step 1: Place the cake on a cutting board and cut evening in half (so you will have two 9 x 6.5 pieces) then split those in half, so you will end up with four 9 x 6.5 pieces.) Place the one piece in the bottom of each of your 8 x 8 pans. You will need to trim the side a bit to make them fit. Take that extra piece and use it to fill in the gap on the 6 inch side.
Step 2: Brush cakes with coffee (I use more coffee on this layer, and let it sit longer, so I’d say use 3/4 cup on each base cake, it will soak in.) If you are using any sort of liquor in your tiramisu, add it to the coffee before brushing it on the cakes.
Step 3: While the cakes are soaking up the coffee, place the ricotta and whipping cream a bowl (I use my stand mixer with the whisk attachment) and beat until incorporated, then add the powdered sugar. Beat until it is thick, but make sure not to over beat.
Step 4: Put 1/4 of the filling on each cake bases and smear it around to cover, it doesn’t need to be pretty, but you want to make sure it is a nice thick layer, so use more filling if you need to.
Step 5: Place the second cake layer on top and brush the rest of the coffee, the add the rest of the filling and spread around to cover.
Step 6: Place the cakes in the fridge at this point and let chill for at least 4 hours, but I’d say 12 hours is the best.
Step 7: Just prior to serving, remove from the fridge and using a fine mess sifter/strainer, sprinkle cocoa powder onto the tiramisu.
Step 8: Scoop out a serving and place in a bowl. Share if you must.
This seems to be a somewhat complicated recipe, but the hardest part is making the cake, and that can be down a day or two in advance as well. Â While I don’t always recommend starting out with a packaged good, I will say I have made this with a Sara Lee pound cake and it was also very good.
What about that other one you made at the same time? Well, I read that you can freeze them, so I put the other one in my freezer (it’s Lent folks, let’s not get crazy here). I’ll let you know how it is unthawed in a few weeks. Until then, you can always half the recipe. (I’d suggest making the whole cake then freezing the part you don’t use, cake freezes and thaws beautifully.)
*I found Woodland Bakery a few days ago and have been watching the videos to get tips on baking. I’m going to say that Gretchen (the baker) is very good at explaining the ins and outs of baking. I’d compare her to Alton Brown in terms of teaching, minus the sock puppets. The nice thing about her sponge cake is that the eggs are whipped together, none of this separating, whipping the egg whites, then folding them back in business. I like to cook but to be honest, that’s a step I’d rather skip.
One more thing: Yes, I call it Beth’s Tiramisu because I created this particular recipe. I’m going to own it.


